In this post, we will set up a fast and free personal site to showcase your resume, projects, and thoughts. Yes, you could create a react app, ticker with CSS, and set up a database to host information regarding the projects but I have taken a simpler route.
I have taken the approach of Good enough software
Pros,
- Quick to setup
- It is free to host
- It is easy to update the information
Let’s Start
- Setting up a Hugo site from a template
- Setup up the GitHub pages for free hosting
Setup Hugo Site
What is Hugo? It is a static site generator written in the Go language. More about it here.
What I like about it,
- It generates static sites i.e. The content that you see on the screen is readily present in the HTML it is not fetched from the database dynamically and rendered. I like static generation of content that rarely changes I guess so does google for indexing purposes.
- It generates content from markdown. I need not worry about updating my information by changing HTML or creating database records. I can easily create a markdown file Voilà there is my post.
You can quickly install it on Mac using,
brew install hugo
Enough selling the product. Let’s create the site. You can explore Hugo and Hugo’s themes. But I have created a template for you to quickly start creating your site.
Setup
- Download the template from here
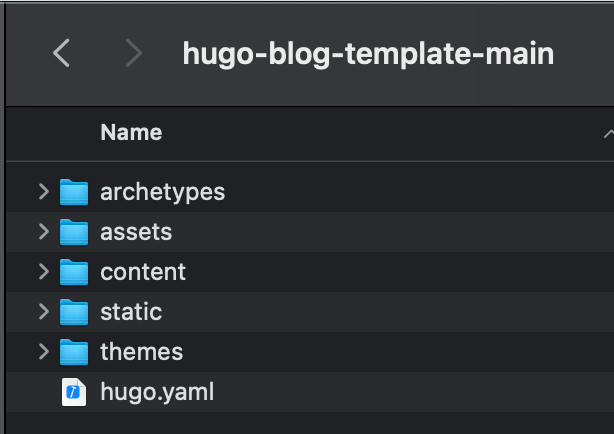
- Unzip it and rename the directory to whatever you want Ex.
my-blogand open it.
Modify the
hugo.yamlto change the default values in the highlighted lines below- Change the baseUrl to github
- Change the name of the site
- Change your title, subtitle and add image if you want
- Add or change social icons
baseURL: https://git_user_name.github.io/
languageCode: en-us
title: My blog
theme: PaperMod

enableRobotsTXT: true
buildDrafts: false
buildFuture: false
buildExpired: false

menu:
  main:
    - identifier: about
      name: about
      url: /
      weight: 10
    - identifier: projects
      name: projects
      url: /projects/
      weight: 20

params:
  profileMode:
    enabled: true
    title: "John Doe"
    subtitle: "Yet another programmer"
    imageUrl: ""
    imageWidth: 120
    imageHeight: 120
    imageTitle:

  socialIcons:
    - name: github
      title: Github
      url: "https://github.com"
- Time to see the changes. Run the following command to start a local server.
hugo server -D
......
......
Web Server is available at http://localhost:59053/ (bind address 127.0.0.1)
Press Ctrl+C to stop
- It starts the server at some ports ex.
http://localhost:59053/as shown above, navigate to it.

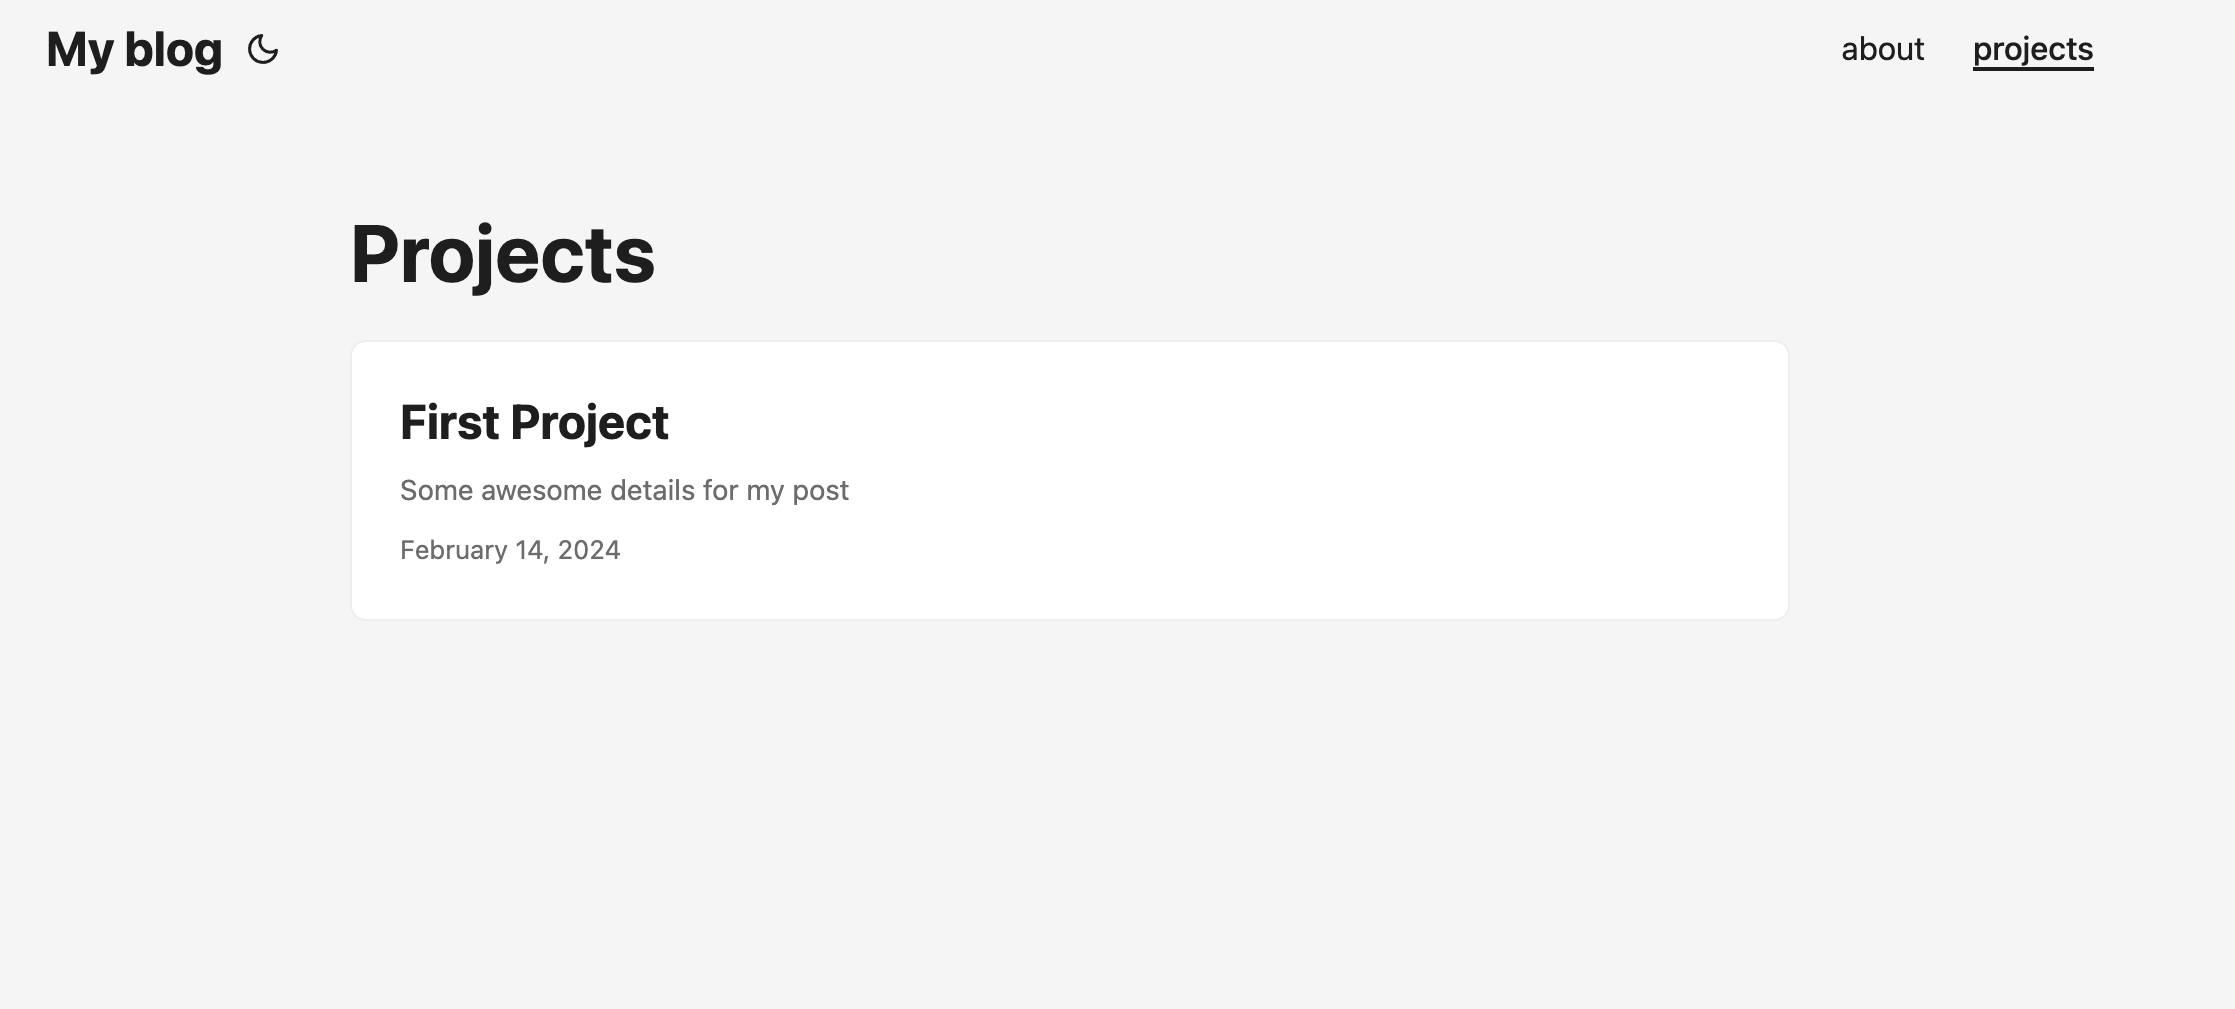
- Yippeyy. It works! but it’s empty. Let’s fix that.
Add project content
Create a markdown file for your project by running the command.
hugo new content projects/first-project.md
It creates a file
content/projects/first-project.mdAdd some markdown text to it
1+++
2title = 'First Project'
3date = 2024-02-14T12:20:22-05:00
4draft = false
5+++
6
7Some awesome details about my project
- Tada! We added a new project to my site by simply creating a file.
- We created the blog and added some projects. Now let’s deploy it for free.
Setup GitHub
Do you know you can host a static site for free on GitHub with cool looking URL like this https://nikhil-vemula.github.io/
Let’s do that.
- Create a public repository on GitHub with the name
<github_user_name>.github.io. Replace thegithub_user_name` with your github username. - Go to your
my-blogdirectory, replacegithub_user_nameas shown below, and run the following commands.
git init
git commit -m "first commit"
git remote add origin https://github.com/<github_user_name>/<github_user_name>.github.io.git
git push -u origin master
- The above commands will create a commit and push your blog to github.
- You can verify by going to
https://github.com/<github_user_name>/<github_user_name>.github.io
Setup Github Pages
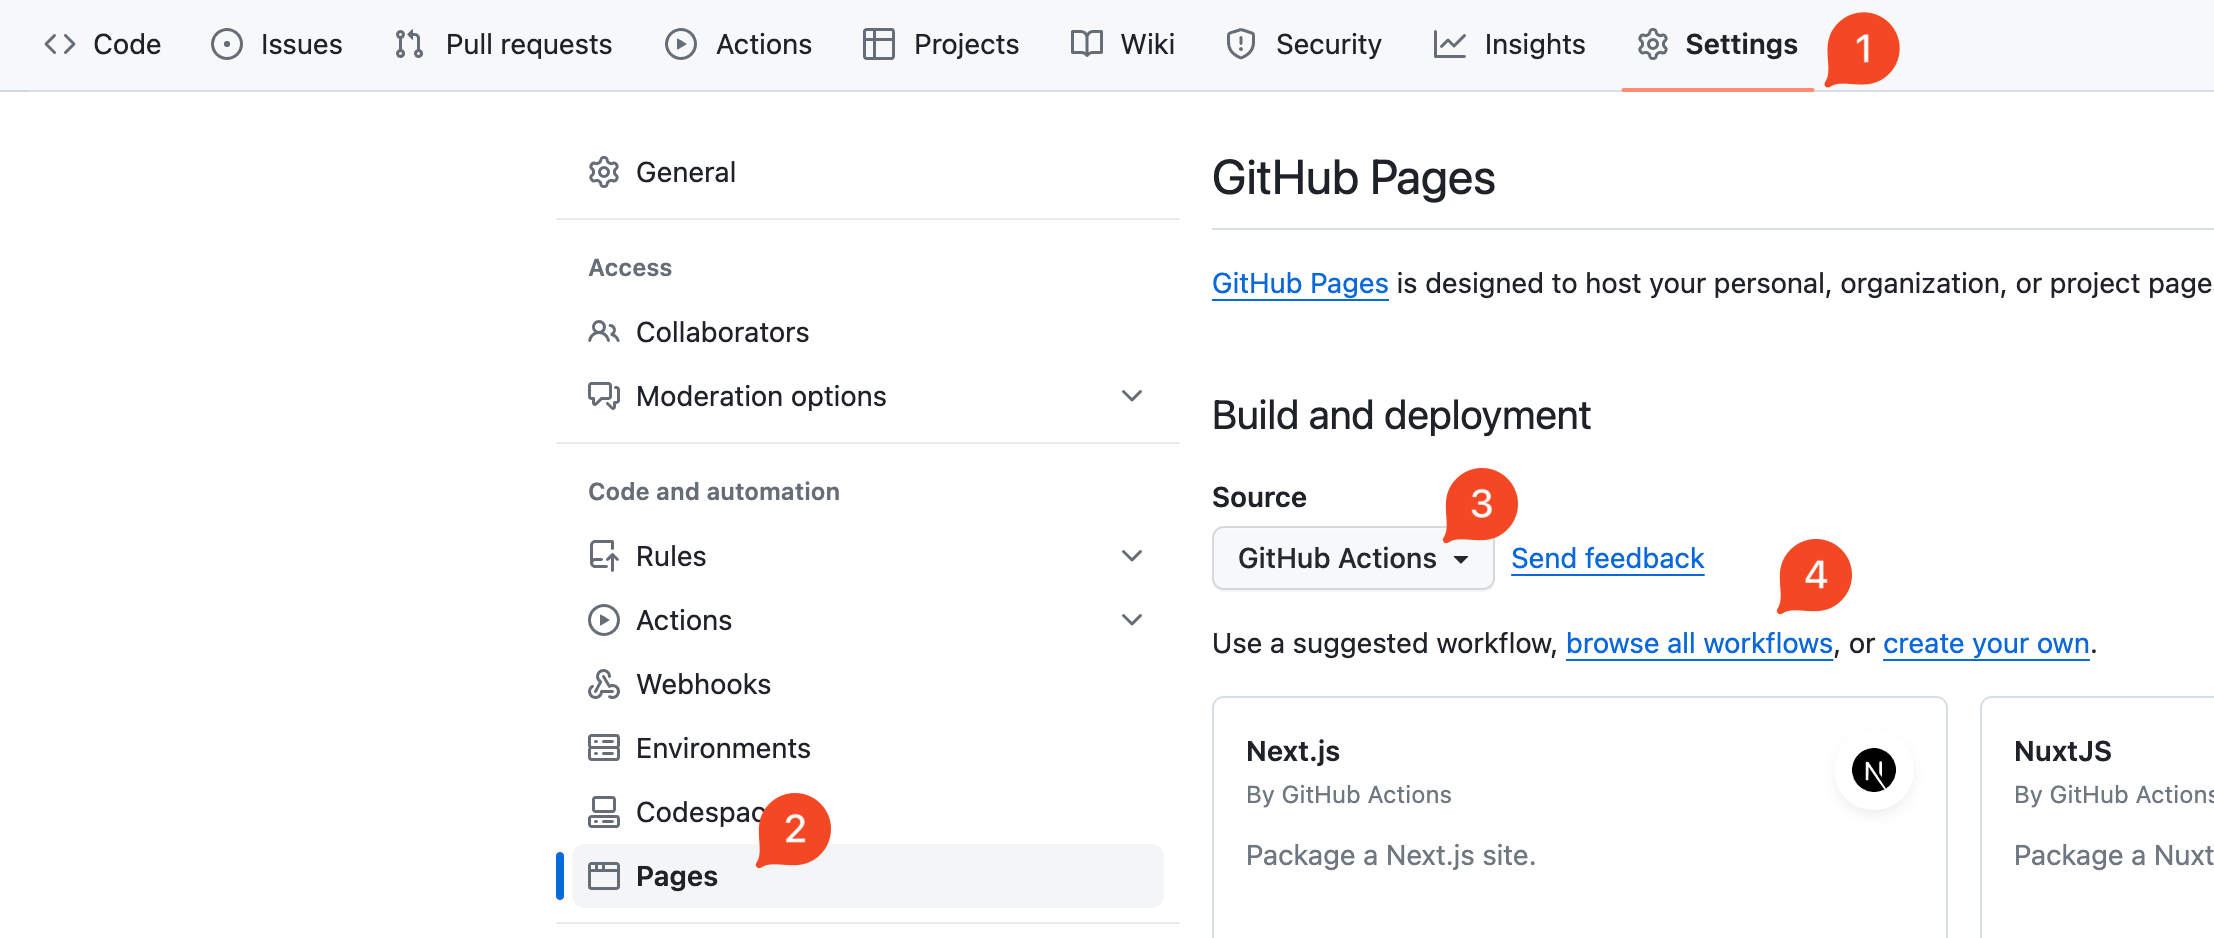
- Go to the settings of the repository
- Go to Pages
- Change the source to
Github Actions - Click on browse all workflows
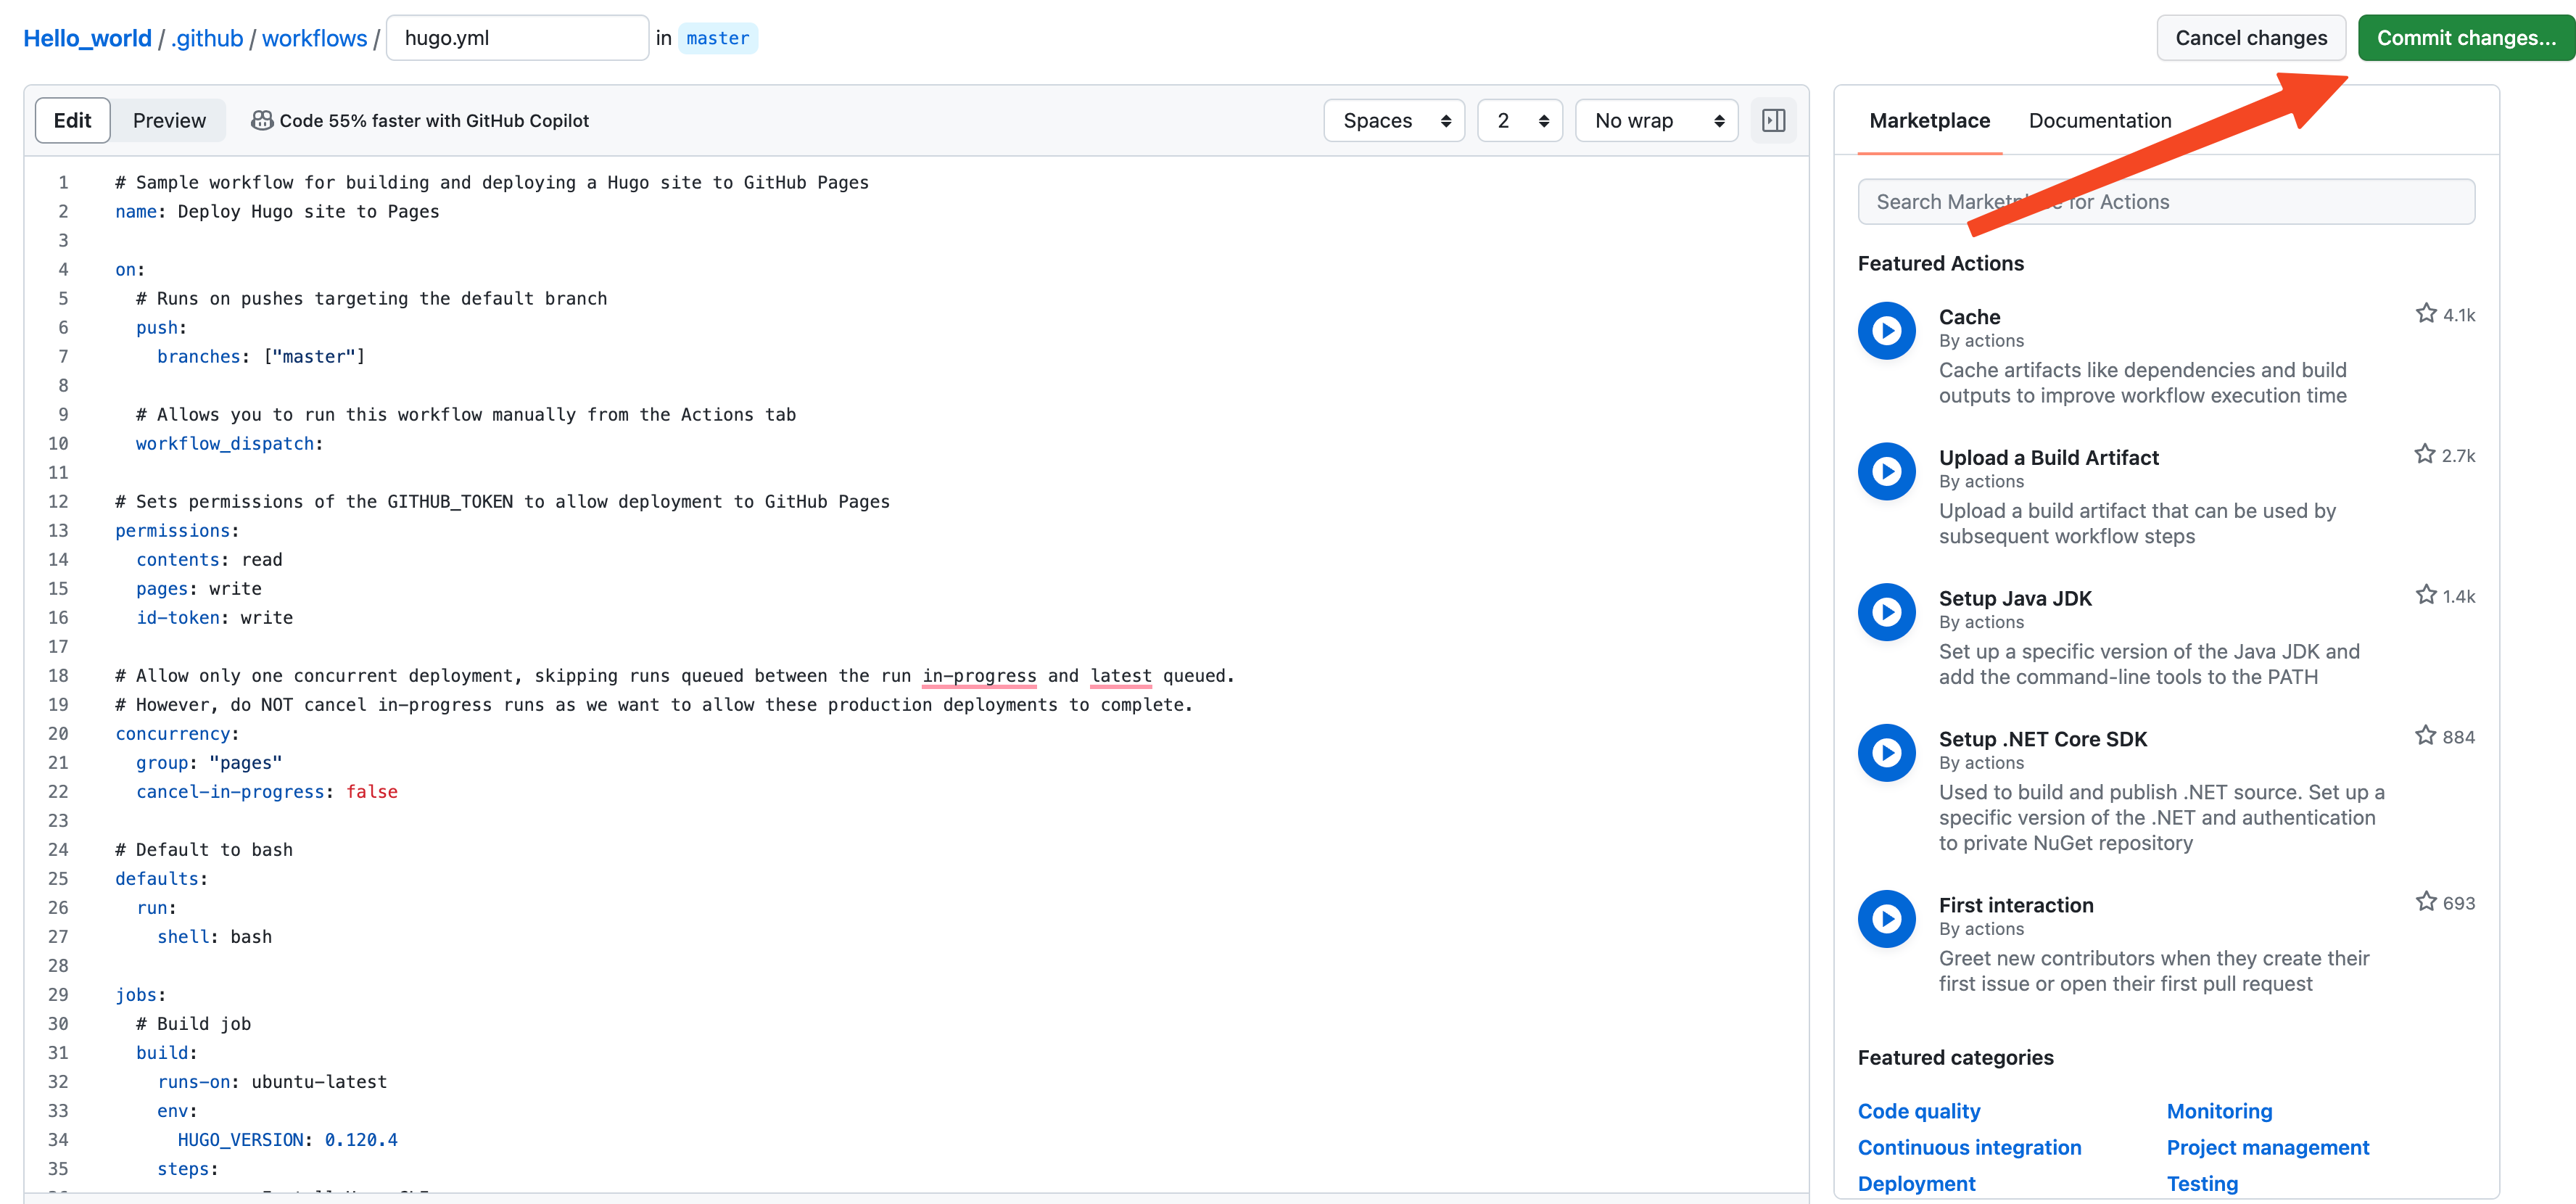
- Search for
Hugoworkflow and click on configure Click on theCommit`` Changesbutton - You can check your build status under the
Actionstab. - Navigate to
https://github.com/<github_user_name>/<github_user_name>.github.io
This adds a .github/workflows/hugo.yml to your repository which builds your site every time there is a new commit to it.
Summary
- We have created a new static site using Hugo and you can add more projects to showcase.
- We have hosted it using free Github Pages
- You can add more features and make it look cooler by exploring Hugo and Hugo themes.